Formatting Numbers, Inserting & Copying
To apply a decimal format to selected cells, right-click them, select Format Cells on the shortcut menu …
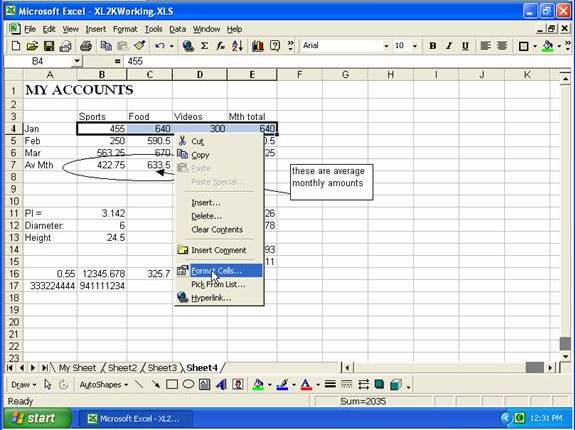
… click the Number tab, click the Number category, set the required number in the Decimal Places box, then click OK.

Click the Decrease Decimal button to reduce the number of decimal places
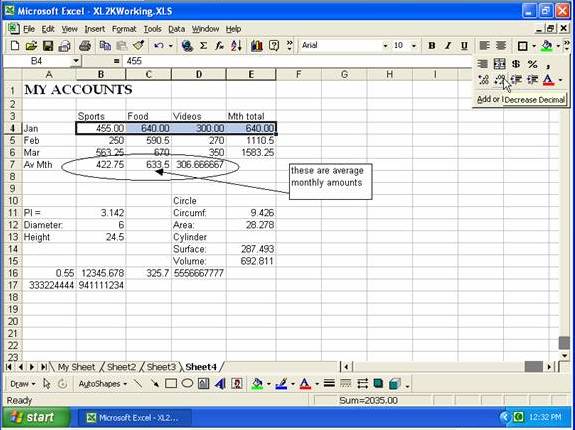
Clicking the Comma Style button will add commas to the numbers (this option also defaults to 2 decimal places).
Alternatively you could go to the Format menu, select Cells …
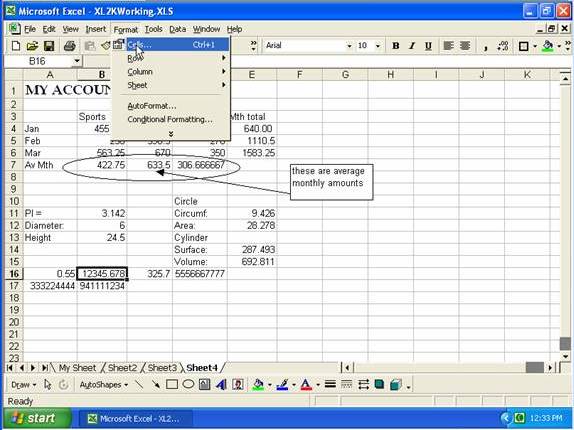
.. on the Number tab select the Number category, select the required number of decimal places, click Use 1000 Separator (,) box, then click OK

To apply the currency style, click the Currency Style button ($) (this again defaults to 2 decimal places)
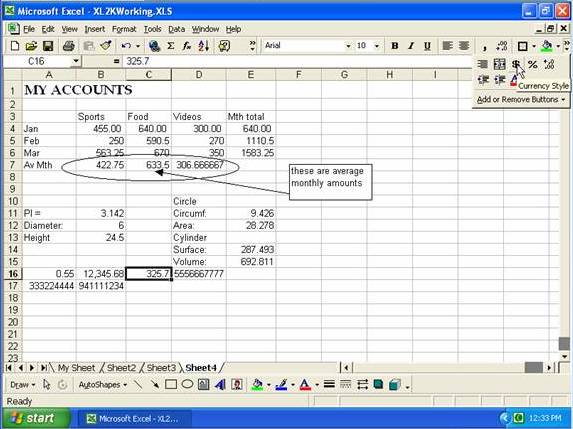
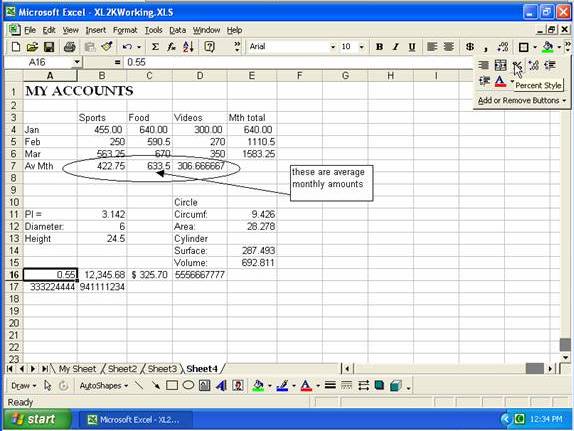
For percentages, click the Percent Style button (%)
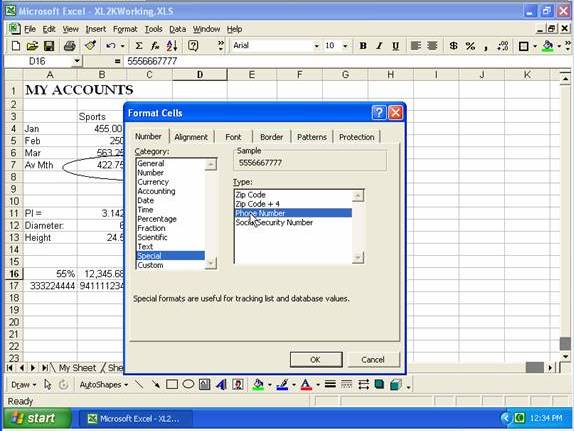
For phone numbers, go to the Format menu, Cells, Number tab, Special, Phone Number, OK.
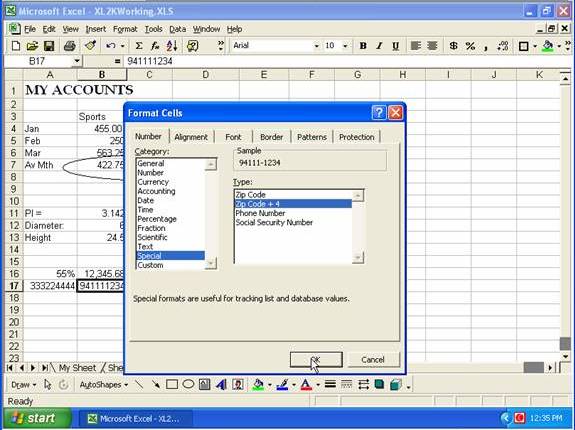
For Zip codes, go to the Format menu, Cells, Number tab, Special, Zip Code + 4, OK.
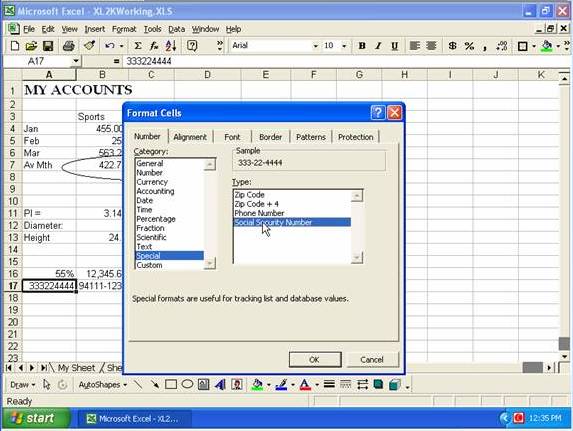
For Social Security numbers, go to the Format menu, Cells, Number tab, Special, Social Security Number, OK.
To create your own custom number format, go the Format menu, Cells, Number tab, Custom, select text in the Type box and type the required format, then click OK
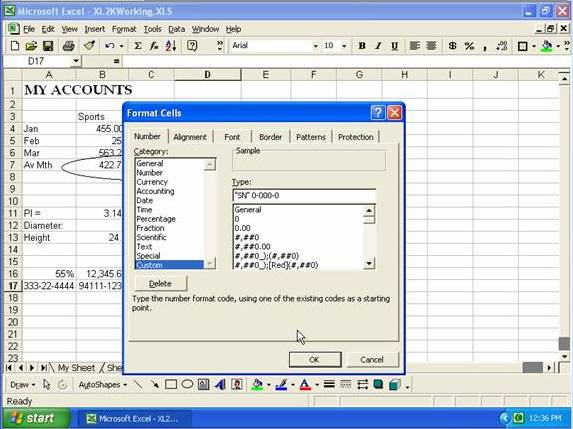
Then you can click in the formatted cell, type a number (without formatting), press Enter, and it will display in your custom format.

If you select a range of cells, click in the Name box, type a name, then press Enter, the name is then applied to the range.
If you click the Name Box arrow, and select a name …
… the applicable cell or range of cells is selected, and you can carry out operations on them, such as formatting.
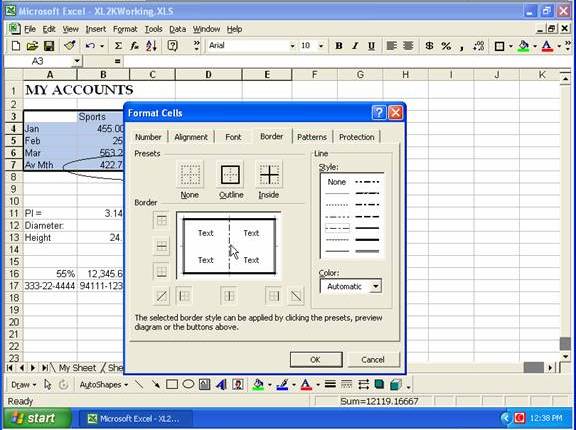
To create a border around selected cells, go to the Format menu, Cells, then on the Border tab select the line style, then click the Outline button
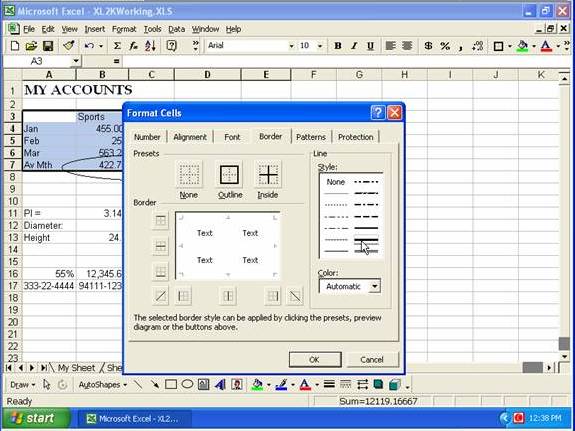
You can select other line styles and add them to vertical or horizontal intermediate lines by clicking in the appropriate position (clicking where a line style has been assigned will change the style or remove the line)
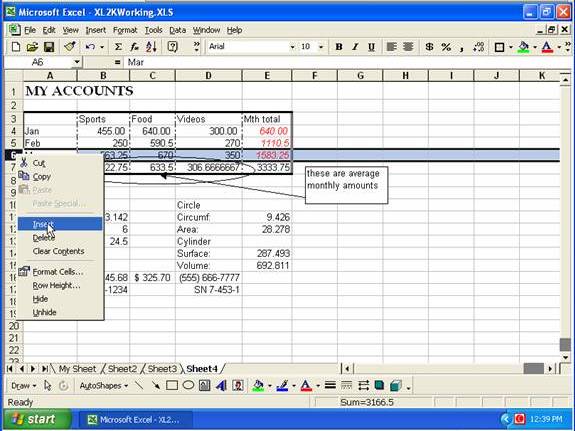
To insert a new row, click on the row header button where the new row is to go, right-click the header button and select Insert
Selecting and a row, then holding the Ctrl-key down while you drag the selected row to your new blank row will cause the selected row to be copied to the new position.
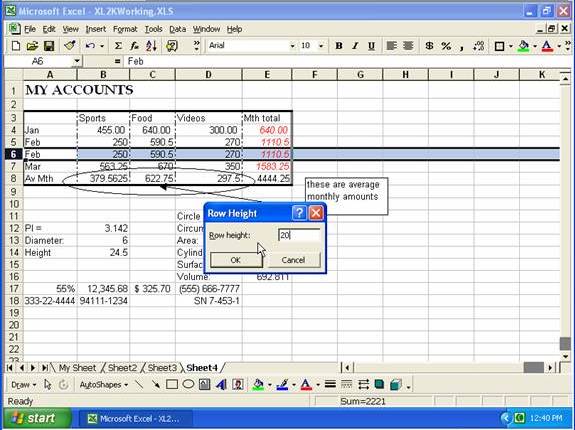
To change the height of the row go to the Format menu and select Row, then Height …
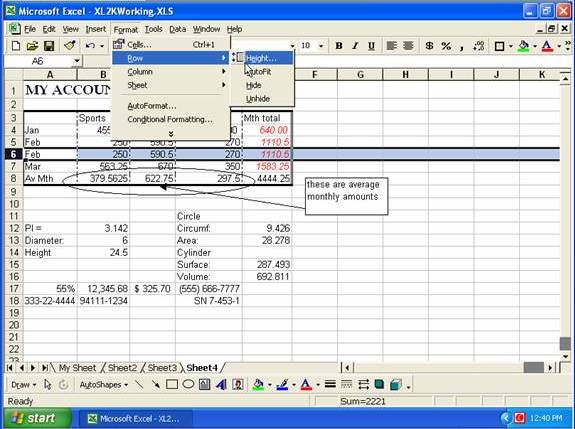
… then enter the required height and click OK (you could also place the mouse pointer over the join between two row header buttons and drag the row out to the size required).
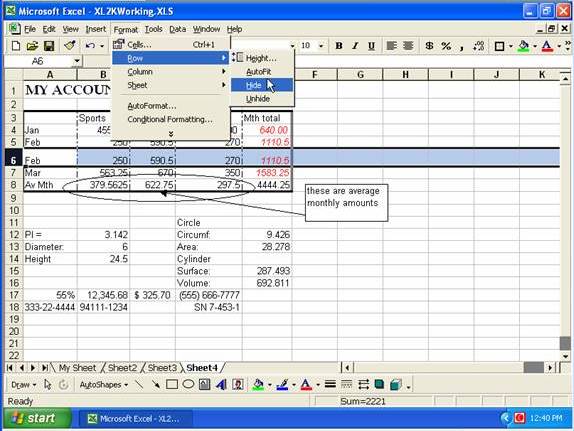
To hide a row, select it, go to the Format and select Row, then Hide.
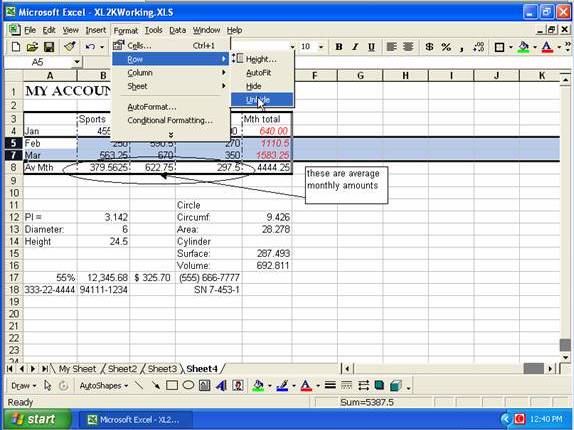
To unhide a hidden row, select the rows on either side of it, go to the Format menu, select Rows, then Unhide.
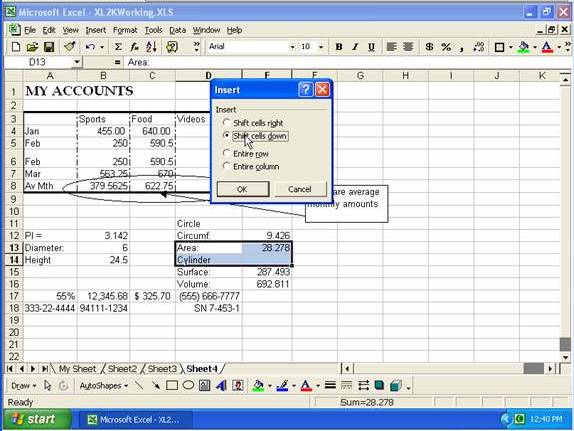
You can insert blank cells into the middle of a worksheet by selecting a block, right-clicking on it, select Insert …
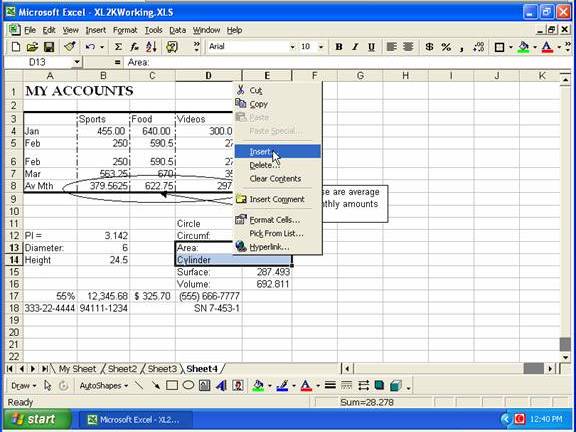
… select the appropriate option, such as “Shift cell down”, then click OK.
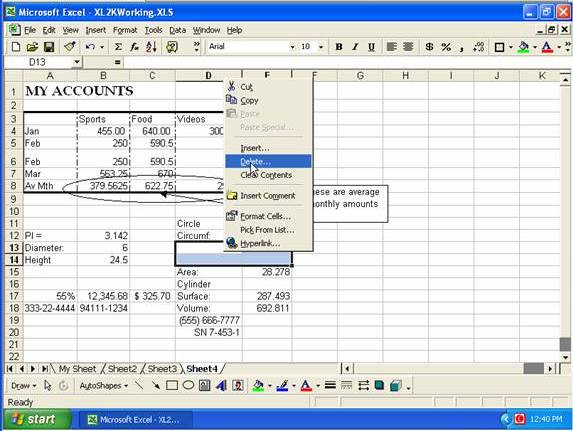
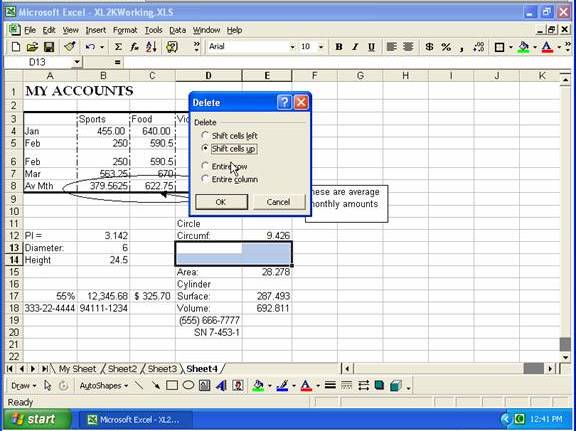
Likewise, you can right-click on a selected block of cells and select Delete …
… select the appropriate option and click OK
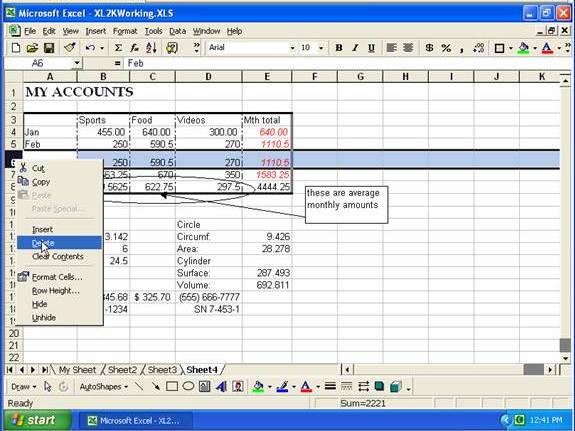
You can delete a row by clicking on the row’s header button, right-clicking on it and selecting Delete.
Copyright www.LaraAcademy.com